To properly break in your new brake pads, start by finding a safe, open road or empty lot. Accelerate to 30–40 mph, then apply light brake pressure for smooth deceleration, repeating this 5–10 times for even material transfer. Gradually increase to 45–60 mph with firmer stops over 4–10 cycles, avoiding overheating. Let brakes cool with gentle driving after. Stick around to uncover more tips for best brake performance and safety.
key Takeaways
- Ensure new brake pads and rotors are installed correctly before starting the break-in process.
- Choose a safe, traffic-free area like an empty parking lot for bedding.
- Accelerate to 30-60 mph, then apply light to moderate braking for 5-10 cycles.
- Allow gradual cooling by driving gently for 2 miles after cycles.
- Avoid excessive pressure or sudden stops to prevent overheating and uneven wear.
Understanding the Importance of Brake Pad Bedding
When you install new brake pads and rotors, the critical process of brake pad bedding can’t be overlooked.
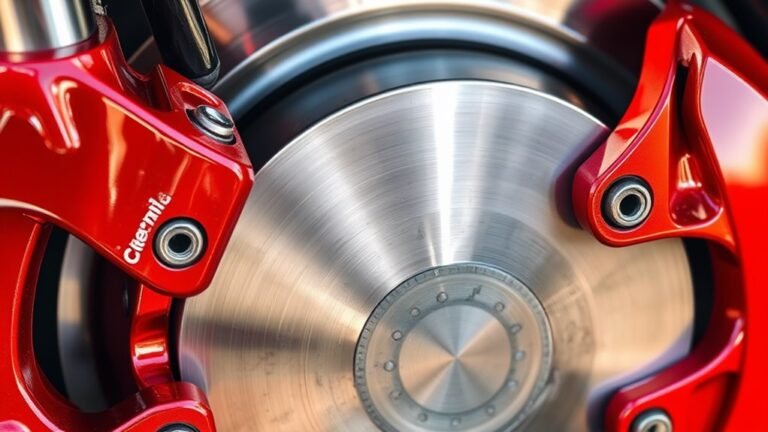
This technique conditions your brakes by transferring a thin, even layer of pad material to the rotor surface, ensuring ideal friction through controlled heating.
It’s essential for Rotor Bonding, as it creates a micro-textured layer on the rotor, enhancing grip and stopping power.
Understanding Pad Chemistry is key; friction heats the pads, releasing resins and gases that bond with the rotor, stabilizing the material for consistent performance.
You’ll notice smoother braking, reduced noise, and improved safety with shorter stopping distances.
Proper bedding also extends component life by preventing uneven wear, which can lead to costly repairs.
Skipping this process can result in uneven pad wear, compromising your vehicle’s braking efficiency.
Don’t skip this step—your brakes’ effectiveness and longevity depend on it.
Additionally, following a structured break-in process with gentle initial stops helps to evenly transfer material and optimize brake performance.
Neglecting proper bedding can exacerbate issues like caliper misalignment issues, leading to inconsistent pressure on the pads and potential safety hazards.
Preparing for the Break-In Process
Before diving into the brake pad break-in process, make sure you’ve properly prepared your vehicle and chosen the right environment.
Prior to starting the brake pad break-in, ensure your vehicle is fully prepared and the setting is ideal for the process.
Start by confirming that your new brake pads and rotors are installed correctly, with all components secure and free of defects or contamination.
Perform Fluid Verification to verify there are no leaks and that brake fluid levels are adequate for safe operation.
Don’t skip Tire Inflation checks—properly inflated tires are essential for maintaining vehicle control during bedding.
Park your vehicle securely with the parking brake engaged and transmission in park or neutral.
Finally, inspect the brake system for any abnormalities and avoid bedding with heavy loads or towing to prevent undue stress on the new pads.
Be aware that new brake pads may squeak initially due to improper mating with rotors, so follow the correct process to minimize this issue with proper bedding techniques.
Additionally, ensure that you choose a safe, low-traffic area for the break-in process to minimize risks during the controlled stops controlled stops.
Remember to follow proper bedding-in procedures to ensure optimal brake performance and longevity.
Choosing the Right Environment for Bedding
As you begin on the brake pad bedding process, selecting the right environment is essential for safety and effectiveness.
Choose a long, flat stretch of road or an empty parking lot with smooth surfaces, free from debris and dust.
Make sure there’s no traffic or pedestrian interference, maintaining clear visibility to avoid surprises.
Consider environmental factors like Altitude Effects, which can alter brake performance due to thinner air and pressure changes.
Wind Influence also plays a role, as strong gusts might affect vehicle stability during repeated acceleration and braking.
Stick to areas away from residential zones to minimize disturbance, and always comply with local laws.
Ensure your brake system is inspected for wear or damage before starting to guarantee a safe bedding process brake system inspected.
Keep emergency tools handy and verify access to alternate routes if conditions change unexpectedly.
Additionally, take a moment to visually check your brake pads through the wheel spokes if possible, to confirm their condition before bedding brake pads condition.
Listen for unusual noises like squealing or grinding, which could indicate worn brake pads needing replacement before proceeding with bedding.
Starting With Gentle Braking Cycles
Having selected a suitable environment for bedding your brake pads, it’s time to begin the process with gentle braking cycles.
Start by driving on a safe, open road and accelerate to a moderate speed of 30–40 mph.
Apply Initial Pressure to the brake pedal lightly, ensuring a smooth, controlled deceleration without abrupt stops.
Follow a consistent Cycle Pattern by repeating this process 5–10 times, allowing the pad material to transfer evenly onto the rotor surface.
This gradual heat buildup prevents overheating and glazing, minimizing vibration and noise.
Between cycles, let the brakes cool if needed, and monitor pedal feel for consistency.
Stick to manufacturer guidelines for speed and cycles, always prioritizing safety and control.
Remember to maintain this gentle approach for the first 300 kilometers to ensure optimal pad-disc mating.
Keep in mind that replacing brake pads without changing rotors can be done if the rotors are in good condition, though it’s wise to consult a professional to assess rotor condition before proceeding.
Additionally, after completing the bedding-in process, perform a test drive to confirm proper brake function and ensure everything is working as expected.
Progressing to Firm Braking Stops
Once you’ve completed the gentle braking cycles, step up to firm braking stops to further bed in your brake pads.
This phase establishes an even transfer layer on your rotors, ensuring ideal friction and stopping power.
Increase your speed to 45–60 mph, then apply firm, controlled pressure to slow to 5–15 mph over 4–10 cycles.
Keep each stop steady and consistent, avoiding ABS activation or wheel lockup.
For precision, consider Driver Training to master braking techniques, and if possible, use Track Testing environments to safely execute these cycles under controlled conditions.
You’ll notice improved pedal firmness and smoother braking.
If you experience a spongy pedal after pad replacement, bleeding the brakes may be necessary to remove air bubbles that compromise pressure.
If you suspect a sticking caliper is affecting brake performance, inspect and clean the slider pins to ensure smooth operation.
Repeat until the pad and rotor surfaces show a matte finish, confirming proper bedding for real-world performance.
After these cycles, allow the brakes to cool down completely to prevent overheating before normal driving.
Managing the Cooldown Phase
After completing the intense bedding cycles for your brake pads, it’s critical to manage the cooldown phase with care to protect your brake system.
This stage guarantees gradual temperature reduction, preventing thermal shock.
Drive gently for about 2 miles, using light, intermittent brake taps to promote brake ventilation and dissipate heat evenly.
Don’t park immediately or brake harshly; instead, reduce speed by 10 MPH with each light application to avoid sudden changes.
Through thermal analysis, you’ll understand that consistent cooling stabilizes the pad-rotor bond, extending lifespan and preventing uneven transfer or warping.
Allow a rest period of 20–30 minutes after cycles to normalize temperatures.
Proper cooldown also helps ensure that the brake pad material transfers evenly to the rotor surface, optimizing friction levels even friction transfer.
It’s also important to note that brake calipers can reach extremely high operational temperatures during intense use, so a proper cooldown is essential to prevent damage.
Additionally, ensuring proper cooldown can prevent issues like a rear brake caliper piston failing to retract, which may cause dragging problems piston retraction issues.
Stick to this process to avoid hotspots and guarantee reliable braking performance over time.
Monitoring Brake Temperature and Performance
Let’s shift focus from cooling your brakes to keeping tabs on their temperature and performance during the break-in process.
Monitoring brake temperature with advanced Thermal Sensors, like Type K thermocouples embedded in pads or rotors, gives you real-time data up to +400°C.
These sensors, often part of systems like RACELOGIC, provide heat maps and detailed Performance Analytics, helping you spot uneven heat distribution or hot spots.
Use this data to adjust your driving style, preventing overheating and ensuring proper pad bedding.
Track peak temperatures and gradients to confirm consistent conditioning over successive stops.
With durable sensor materials like stainless steel braiding, you’ll maintain reliable readings.
Additionally, advanced systems can measure surface temperatures across a wide range from -4 °F to 2012 °F wide temperature range.
Leverage this feedback to optimize cooldown intervals and achieve a successful break-in.
Considering the benefits of ceramic brake pads, their consistent performance across varied temperatures can be particularly advantageous during the break-in period.
For daily drivers, opting for high-quality ceramic pads like Akebono can ensure quiet operation and reduced dust during this critical period.
Avoiding Common Break-In Mistakes
While breaking in new brake pads, you must steer clear of common pitfalls that can compromise performance and safety.
Don’t ride your brakes or apply excessive force initially, as this overheats pads, causing uneven material transfer.
Avoid excessive brake pressure early on to prevent overheating, which can lead to uneven material transfer on new pads.
Gradually build braking force to condition the pad surface properly, and stick to recommended speed and braking intervals to prevent glazing.
Also, guarantee proper Pin Lubrication by applying high-quality grease to caliper pins to avoid sticking and uneven wear. Ensure you use a silicone-based or synthetic grease for optimal performance under extreme temperatures silicone-based grease. Additionally, consider using a high-temperature grease like polyalkylene glycol-based options for superior anti-wear performance in metal-to-metal contact.
Don’t neglect Fluid Flushing; failing to replace old brake fluid introduces contaminants and moisture, reducing system efficiency and pad life.
Avoid high-speed driving or sudden stops during break-in, as these stress new pads.
Ensure correct pad installation to prevent misalignment and rotor damage, which can occur if pads are installed backwards incorrect pad orientation.
Recognizing Signs of Proper Bedding
Moving from avoiding common break-in errors, you should now focus on identifying the telltale signs that your brake pads are bedding in correctly.
First, notice Brake Symptoms like a firmer pedal feel, consistent stopping power, and immediate response without lag.
You’ll also experience smooth, quiet operation with no squealing, vibration, or judder during braking.
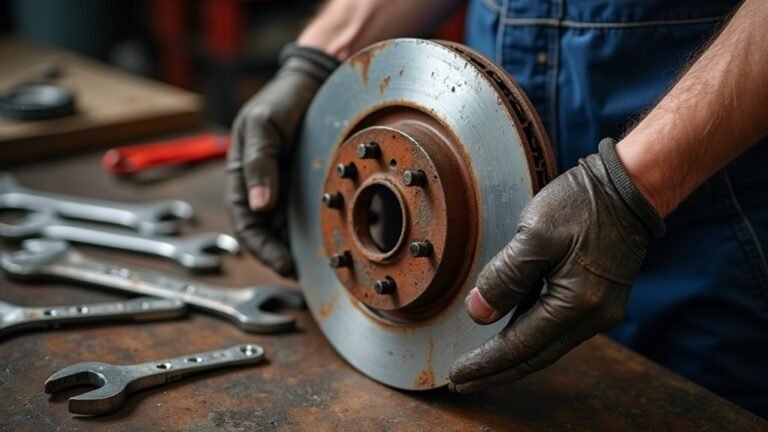
Next, perform a Rotor Inspection to confirm even wear. Additionally, during the initial 50-100 miles of driving, expect a strong initial brake effect from brake-in coating as the pads seat to the rotors.
Look for uniform discoloration on the rotor surface and a thin, consistent film of pad material, indicating proper transfer.
Verify there’re no hot spots or uneven patches.
Additionally, check for gradual warming of components without overheating or burning smells.
Be aware that worn-out pads often show signs like squealing noises during braking, which should not occur with new, properly bedded pads.
Remember that proper bedding at this stage can significantly impact the overall brake pad longevity.
These precise indicators confirm your brake pads are bedding in effectively for peak performance.
Maintaining Brake Health After Break-In
Take charge of your brake system’s longevity by focusing on proper maintenance after the break-in period.
Empower your brake system’s durability by committing to diligent maintenance post break-in for lasting performance.
Prioritize Fluid Maintenance by replacing brake fluid at recommended intervals and bleeding the system to remove air, ensuring peak hydraulic performance.
Inspect lines and hoses for leaks or damage to prevent fluid loss.
For Wear Monitoring, regularly measure pad and rotor thickness with a caliper, replacing components at minimum safe levels.
Listen for unusual noises like grinding and note changes in pedal feel, addressing issues promptly.
Keep brakes clean from debris and contamination, and allow natural cooling after heavy use. Remember that normal driving can seat pads effectively over time, achieving results similar to specific bedding procedures.
Adopt smooth braking habits to minimize stress.
Additionally, follow a systematic approach when bleeding brake calipers to ensure no air bubbles remain in the system for optimal safety and performance.
Follow the standard bleeding sequence of right rear, left rear, right front, and left front to prevent system contamination and maintain hydraulic pressure.