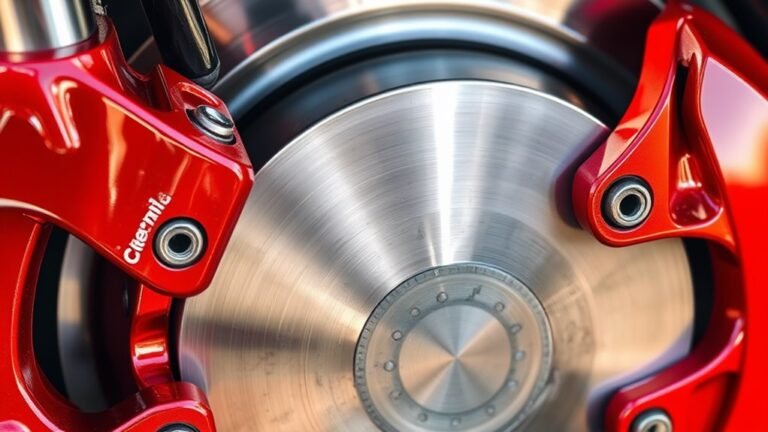
Yes, you can change your own brake pads with the right tools and know-how, saving $100 to $300 per axle in labor costs. Grab essentials like a jack, lug wrench, C-clamp, and torque wrench. Park on a level surface, secure the vehicle with jack stands, and wear protective gear. Follow your vehicle manual for precise steps to remove old pads and install new ones. Stick around to uncover more detailed guidance.
key Takeaways
- Yes, you can change your own brake pads with proper tools and safety precautions.
- Ensure your vehicle is on a level surface and securely elevated on jack stands.
- Use essential tools like a C-clamp, torque wrench, and lug wrench for the process.
- Follow manufacturer specs for pad installation, caliper reassembly, and bolt torqueing.
- Test brakes at low speeds after installation to confirm proper function.
Getting Started With Brake Pad Replacement
Before diving into brake pad replacement, make sure you’re fully prepared for the task.
Personal Readiness is critical—review your vehicle manual for specific instructions and assess your comfort with the process.
Park on a level surface, engage the parking brake, and guarantee the vehicle is stable before starting.
This groundwork prevents mishaps and builds confidence.
The DIY Benefits are clear: you’ll save on labor costs and gain hands-on knowledge of your vehicle’s braking system.
Take time to check brake fluid levels and monitor pad wear for evenness.
Recognizing signs like squealing or grinding noises can help you determine the right time for replacement squealing or grinding.
Secure the vehicle properly to avoid shifts during the job.
Having the right tools, such as a jack and lug wrench, is essential for a smooth process right tools.
Additionally, ensure you have safety gear like safety glasses and masks to protect yourself during the replacement process.
With careful preparation, you’re setting yourself up for a successful replacement, guaranteeing safety and precision every step of the way.
Essential Tools and Materials for the Job
With your preparation complete from getting started, let’s focus on gathering the right tools and materials for brake pad replacement.
You’ll need a jack, jack stands, lug wrench, socket set, ratchet, and wrenches like Allen or Torx for caliper bolts.
Grab a C-clamp or brake caliper spreader for compressing pistons, plus brake cleaner and grease for cleaning and lubrication.
Don’t skimp on new brake pads and brake fluid for topping off.
Additionally, ensure you have a clean workspace to prevent contamination of brake components during replacement with proper brake fluid management.
For Tool Maintenance, make sure your equipment is clean and rust-free to avoid damaging components. Remember that a well-maintained ratchet and socket set forms the core of a mechanic’s toolkit for versatile repairs.
If you’re missing tools, consider Material Alternatives like borrowing a torque wrench or using a sturdy breaker bar.
Add safety glasses, gloves, and a dust mask to protect yourself while working efficiently.
Investing in these tools not only helps with brake pad replacement but also offers long-term utility for future DIY repairs.
Safety Tips Before You Begin
As you gear up to replace your brake pads, prioritize safety to prevent injuries and guarantee a smooth process.
When replacing brake pads, put safety first to avoid injuries and ensure a seamless experience.
First, perform Ventilation Checks to verify your workspace has adequate airflow, reducing exposure to harmful brake dust and fumes.
Then, focus on your Lighting Setup—make sure the area is brightly lit to spot potential hazards and avoid mishaps due to poor visibility.
Next, equip yourself with essential protective gear: wear gloves, safety glasses, a respirator, and sturdy shoes to guard against cuts, debris, and inhalation risks.
Clear clutter from your workspace to prevent tripping, and keep tools organized. Always have the right equipment, such as jack stands for securely lifting and supporting the vehicle during the brake pad replacement.
Take regular breaks to stay focused, and have emergency contacts and a fire extinguisher handy for unexpected situations.
Additionally, ensure you park on a flat surface and engage the parking brake to secure the vehicle during the replacement process parking brake security.
Lastly, be mindful of brake fluid levels and avoid spills, as they can be hazardous and require proper handling with manufacturer-grade parts for replacements.
Preparing Your Vehicle for the Task
Now, now that you’ve got your safety measures in place, let’s get your vehicle ready for the brake pad replacement.
First, make sure you’re on a Level Parking surface to prevent any rolling—engage the parking brake firmly.
Check your Vehicle Manual for specific guidance on your car’s brake system and any unique requirements.
Position your vehicle in a well-lit, accessible spot to work efficiently.
Gather all necessary tools like a jack, lug wrench, and socket set, plus your new brake pads.
Loosen the lug nuts on the wheels you’ll be working on, but don’t remove them yet.
This prep guarantees stability and accessibility, setting you up for a smooth process as you move forward with the task.
Ensure you select high-quality brake pads, like Wagner brake pads, for premium braking performance.
Wagner brake pads are known for their low dust production, ensuring cleaner wheels even after extended use.
Remember to jack up the vehicle safely using the correct jack points to avoid damage or injury.
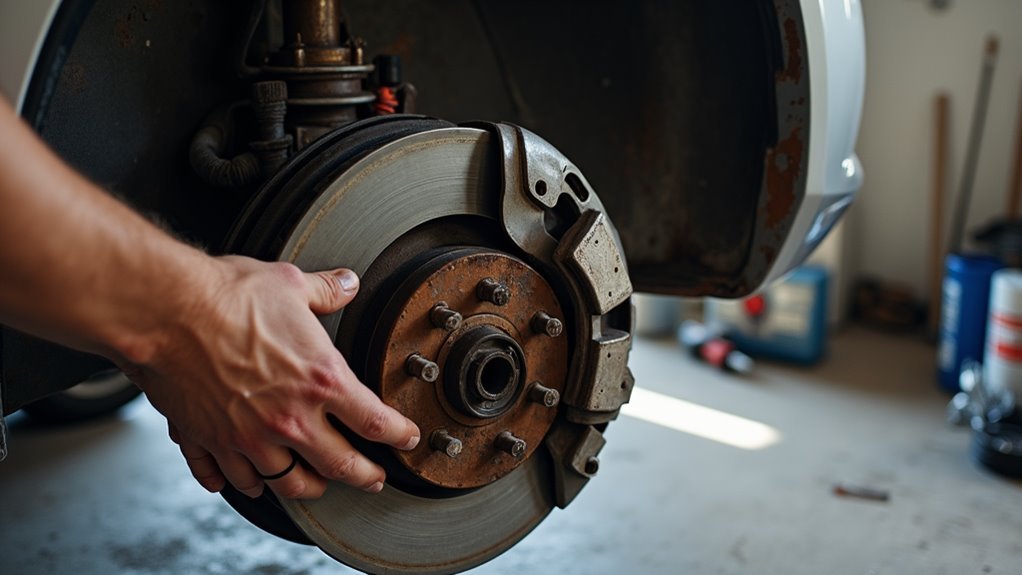
Steps to Remove Old Brake Components
Let’s dive into the critical process of removing your old brake components with precision.
Start by parking on a flat surface, engaging the parking brake, and using jack stands for safety.
Loosen the lug nuts, jack up the vehicle, and remove the wheel to expose the brake assembly.
Employ Access Techniques like turning the steering wheel to reach caliper bolts easily.
For Component Identification, locate the two caliper bolts securing it to the bracket and note the brake line position to avoid strain.
Use a 14mm socket or breaker bar to loosen the lower bolt first, then the upper, and slide the caliper off the rotor.
Suspend it with a wire to protect the hose, then extract the old pads from the bracket.
Before fully removing the caliper, slightly loosen the banjo bolt on the brake line while the caliper is still mounted to minimize fluid loss.
Always wear safety goggles and gloves to protect yourself during this process safety goggles and gloves.
Remember to handle the caliper carefully to avoid damaging the brake line or other components during removal brake line protection.
How to Install New Brake Pads
After successfully removing the old brake components, you’re ready to install the new brake pads with careful attention to detail.
Start by ensuring Piston Compression is done correctly using a C-clamp or brake caliper tool to push the piston back into the caliper, allowing space for the new pads. Always prioritize safety by wearing gloves and securing the vehicle on jack stands before working on the caliper brake caliper safety. Be sure to follow the proper torque specifications for all bolts to ensure safe braking performance.
Then, focus on Pad Alignment as you slide the new pads into the caliper bracket, securing them with anti-seize on the clips. Make sure to apply anti-seize properly to prevent future sticking or corrosion of the components.
Follow these precise steps for a flawless installation:
- Compress: Double-check Piston Compression to avoid fitment issues.
- Align: Confirm Pad Alignment by seating pads firmly in place.
- Secure: Reinstall the caliper, tightening bolts to manufacturer specs with a torque wrench.
Finally, reassemble the wheel and check brake fluid levels.
When and How to Replace Rotors
How do you know when it’s time to replace your brake rotors? If you feel vibrations in the steering wheel or pedal, hear grinding or squealing during braking, or spot grooves and scoring on the surface, don’t wait.
Measure rotor thickness with a micrometer against manufacturer specs—below minimum means replacement.
Check rotors every service, as they wear at half the rate of pads, typically lasting 40,000 to 60,000 miles.
When replacing, opt for high-quality rotor materials to boost durability and aid warping prevention through better heat resistance. Driving style and environment can also accelerate rotor wear, especially in harsh conditions like city or mountain driving.
Always replace rotors in axle pairs for balanced braking, and use proper tools like torque wrenches. For specific models like the Toyota Camry, refer to torque specifications such as 79 ft-lbs for caliper bolts to ensure proper installation.
Inspect regularly for cracks or uneven wear to maintain safety and performance. Additionally, ensure rotors are replaced if they show excessive grooving or warping, as this can reduce braking efficiency and compromise safety.
Reassembling and Final Checks
Once you’ve installed the new brake pads and rotor, carefully reposition the brake caliper over them without forcing it to prevent damage to the components.
For proper Caliper Securing, align the slider bolts or mounting bolts precisely, then torque them to the manufacturer’s specs using a torque wrench for a safe fit. For example, on certain GM trucks like the Silverado 2500HD, the caliper bracket to knuckle bolts should be torqued to 221 ft-lbs. Additionally, for vehicles like Tesla or Audi, following specific torque specifications is crucial to ensure proper installation and safety.
When securing the caliper, ensure slider bolts are aligned perfectly and torqued to manufacturer specs for a secure, safe installation.
Inspect brake lines for kinks and make sure anti-rattle clips are in place. Always refer to your vehicle owner’s manual for specific instructions on torque specifications and assembly procedures specific torque instructions.
Key final checks include:
- Verify brake fluid level and top off if needed, making sure no leaks.
- Confirm caliper movement is smooth with no binding.
- Check that wheels spin freely without noise from new pads.
Before driving, remember Brake Bedding—avoid abrupt stops for the first 100-200 miles to optimize pad and rotor performance.
Testing Your Brakes After Replacement
Now that you’ve reassembled your brake system and completed the final checks, it’s time to put your work to the test by evaluating the performance of your newly installed brake pads.
Start by lowering your vehicle, ensuring stability, and pumping the brake pedal to seat the pads and build pressure.
Confirm the pedal’s firmness, then listen for odd noises like squealing.
If you suspect air may have entered the system during pad replacement, consider bleeding the brakes to ensure optimal pressure and responsiveness bleeding the brakes.
When bleeding, follow the correct sequence of calipers to prevent issues with fluid contamination correct sequence of calipers.
Next, conduct a road test in a safe, low-traffic area.
Begin at low speeds, gently applying brakes to assess initial stopping distance.
Gradually increase pressure to evaluate brake modulation and consistency.
Test at varied speeds, noting any fade or vibrations.
After testing, inspect for heat or wear issues, ensuring your brakes perform reliably under all conditions.
Finally, document your observations to track performance over time and ensure ongoing safety track performance over time.